Seen this and similar shots around on Flickr so thought I would have ago at reproducing something along the same lines.
 |
Click for a larger photo.
|
So this shot is composed of the following to shots:
 |
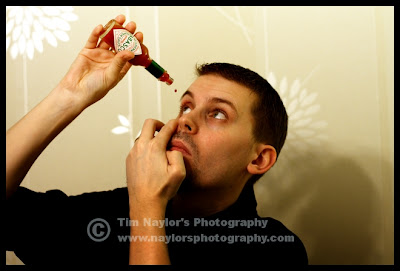
| Top Layer (With bottle cap) |
 |
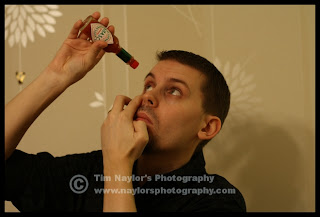
| Bottom Layer (Without bottle cap) |
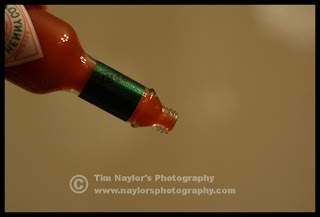
Once you have these two shots you need to add the to your post processing software of choice as separate layers with the bottle of Tabasco as the bottom layer. You need to use the transform tools to rotate the bottle to match the same angle as the bottle you're holding and also resize it so the two bottles line up exactly on top of each other. Now in the layers panel you want to add a layer mask to the top layer and set it to "White (Full Opacity)" not in your tools panel select the eraser making sure the eraser colour is set to white with a soft edged brush type. The next step is really easy all you want to do is on the top layer erase the bottle top which should reveal the layer below which should be the bottle without a bottle top, you may need to mess around with the curves tool to make sure the colours of the two layers match). The final stage differs depending on which post processing tool you have chosen but all you need to do is add small circle and select the colour to be the same as in the bottle of Tabasco, then add some motion blur to give the impression the drop is falling. Depending on what package you are using you can even add some lighting and reflection to the drop to make it more realistic.


No comments:
Post a Comment